I was all set to share the Tiny Stars journey this week and then something more important happened...
A few weeks back, I shared the quilt I'd made for him. In that post is the story of why his name is Micro BUJ, but I can definitely say he is living up to the name...
He is nearly a month earlier than the last due date I'd heard, but I know even with all the modern technology doctors have, it's an estimation. My brother-in-law (his grandpa) is over the moon happy. And being the first of this generation on that side of the family, he's gonna be S.P.O.I.L.E.D.
So now on to the Tiny Stars journey.
In 2017, I made a few tiny (wonky) stars on a whim. I had some random bits of fabric and decided to just do something random.
And then an idea was born...what if I made a tiny star from EVERY SINGLE FABRIC I own?
I started with red because it coincided with my Rainbow Scrap Challenge color that month. (And apparently I haven't officially blogged about the Cat Quilt I did that year - it's in this post, but you'll have to scroll down a ways because it was a year-in-review post and I didn't post much in 2017. Blogging about that quilt is going on the to-do list!)
Organization was going to be a problem, so...
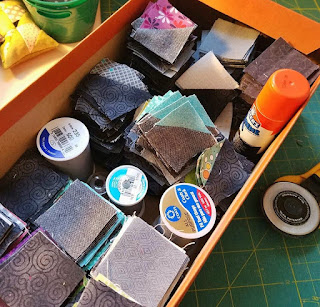
...little baggies were employed to hold the eight star point fabrics I'd need for each block and then a little snippet was glued into a binder so I could hopefully avoid duplicates.
Since the fabric challenge had started a few months before, I did have to go back into my stash, but I also kept up each month, sewing many stars in fits and starts.
It dragged into 2018, where I worked on them during my guild's quilt show...
...and then into the realization that my stash was not going to be enough for a bed-size quilt (which was the plan once I graduated from a few pincushions). So I started raiding my mom's stash - having that notebook was great because I knew what colors I was short on...and what she might have duplicates of!
I also went from sewing one or two stars at a time (chain-sewing, but minimally) into a BIG BATCH because I was ambitious. Or crazy.
2019 did not have much to show for these, so on to 2020 where another big push happened...
I think I set myself a goal or something, so I ended up with this collage. Gabby helped (of course).
In 2021 I finally got myself together, and with the ability to use the Design Floor in our local library community room at a guild sew-in, I came up with a layout.
(That was a LOT of crawling around on the floor!)
Home to begin top construction!
As I completed rows, I rolled them. This seemed more efficient than folding, but I suppose it also just appealed to my sense of whimsy.
Then came the LOOOOOOONG seams. At one point, I thought to offset these by one third of a block, but there would still be seams to match, so I changed my mind back to just a straight set. I matched the corner seams, but not those within the block. Being wonky, it wasn't going to make a big difference. I wasn't losing any points anyways, so why make this harder than it needs to be?
LOTS of pins in each row, and it got heavier and heavier as I went, but I managed to get it into a top.
And then it sat.
This year (2023), I bought fabric for the back. I pieced it. And still procrastinated.
Then one day...
I debated doing swirls all over, but with so many seams and seam allowances, I was worried it would just be too much for my machine. I know these machines are designed to go through a LOT (like fingers?), but still.
So I went with a wavy line, using block intersections as a guide.
And this is the only photo of the back. But it is made up of two fabrics - this one and this same print, but with a dark grey background. (There wasn't enough of the grey background fabric, so I just rolled with it.)
The front?
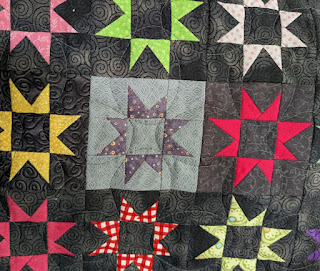
It's a bit harder to see here, but I tried for a spot where the thread would show so you can see how that design above fits into the block. Kind of like an Orange Peel in my mind, but maybe not.
It's been done for a while. I used leftover bits of binding to bind it. But the hangup was getting a full quilt photo. My parents have a nice walk-out basement that provides a nice balcony upstairs to drape a quilt on and get a photo. But do I remember the quilt when I go over? NOOOOOOOO!!!!
So last week I decided to just put the darn thing on my bed and take a photo and finally get to use this new quilt for my bed.
Pattern: wonky stars (google it - many quilters have tutorials)
Size: 99" x 99" (or so)
Block size: 3" x 3" finished
Number of blocks: 1,089 (set 33x33)
Number of pieces: 18,513
Construction duration: 6 years - on and off
I should also weigh it. It is H.E.A.V.Y.
I love it.
(I made the bed more properly after this photo (you know, with pillows and whatnot), but this shows it off quite well.)
I am so glad it is done-done-done!
I did find a few duplicate blocks as I was laying it out, and apparently I also can't math well, because I had too many blocks. They're in time-out for a while. But it was kinda nice to have a few extras so I could weed out a few that I liked less (mom's only - ALL of mine are in there) or replace a duplicate if I found it. (I think I only found two, but maybe there are some in the quilt? I did go back and look a few times when I was sewing blocks together.)
And while I'm sharing this today, there was absolutely no work on it this week, aside from putting it on my bed.
So what have I done this week?
Well, it dawned on me that Christmas is coming far sooner than I'd like, so the cat toy construction project needed to speed up.
58 kicker toys, ready for the next step - some method of packaging. I'm thinking of just tying two together with a ribbon or string, and stringing the label through, because I can't find inexpensive bags that are large enough. But even with that, I need to make the little labels that I always attach.
I only got bit twice and managed to add catnip, stuff and sew these shut all in one (LONG) day. (My catnip stash is much depleted, but that's okay. Having to stop in the middle to go buy more stuffing was more annoying - but at least the store had it in stock!)
Next up is the wedding quilt. My goal is to lay out three rows every sewing session. The math I did early last week had me finishing this on Sunday. It did not account for spending a day Christmas shopping (and birthday shopping - I think about half the family has November birthdays and we were behind), nor the other life things that just happen.
But I had lots of help...
...holding down those rowdy pieces...
...making sure it's snuggly enough...
...and most importantly, testing that the back side is strong enough to withstand fort-making. (Just before the photo, he had his paws all the way under and was wrestling the pieces on the other side.)
I did not get the top done by Sunday, but I'm getting closer!
Six more rows to go, but it's really looking like something! And at this point, there will be more larger background pieces, so it will get a little faster.
I've also been working on the Bramble Blooms quilt along applique center. Last week I was thinking about doing a yellow pop in the center of the petals, but wasn't sure.
I woke up one morning thinking I should instead do a cut-out so the background would show through. Kinda like lace, but not nearly so fancy. I dug some little bits of truly scrap fabric from the trash to do an audition...
...and immediately went NOPE! After having seen the yellow, it was a no-brainer that this was too plain.
So I chose a gold I liked, cut a template, cut pieces and started the applique process. I even raided my stash of VERY old threads to get the colors I needed. Of course, that perfect red was rotten and snapped as soon as I tested it. (The gold is fine.) Ah well. Make do!
This morning, in the bright sunshine, I snapped a photo of my progress..
...it's a little goofy with the colors and shadows, but I'm making progress!
It seems like a lot, but I don't feel like it is. But done is done and there's always more to come!
Happy quilting!
Katie


2 comments:
Katie, you really know how to pack a lot in a single blog post! Congratulations to your your great-nephew's parents and grandparents.
Your stars! What an amazing quilt. And what a fun idea to use every single fabric you own. It will be like a memory quilt. So glad you had Gabby's good help.
The wedding quilt is looking great!
And your Blooms! Delightful. (I'm trying to choose fabrics today, then background for the center and get it sewn. I'm glad there's no pressure. I think Audrey said the first border might come at the end of November or sometime in December? I hope so!)
I ust love those Tiny Stars! Great progress on those Bramble Blooms. It's fun to see what everyone is doing for their centers. Lots of creativity. And I just had to go see how Micro BUJ got his name. Now that sounds like some nicknames my hubby's family would come up with. In fact my hubby's brother (Uncle Wacky) passed away in January and one of his brothers gave a little speech at the celeb of life about all the nicknames Uncle Wacky gave everyone over the years. It got a lot of laughs! I escaped a nickname...well, at least one I was called to my face anyway!
And I'm a sucker for heart quilts so that Wedding quilt has my heart aflutter.
Post a Comment